

- How to Find the Best 5 String Violins - April 21, 2022
- How to Hold a Violin Bow - April 21, 2022
- How to Hold a Cello Bow - April 17, 2022
Summary: Learning how to hold a cello bow can give you greater stability and confidence playing your instrument. Learning the wrong technique can do the opposite.
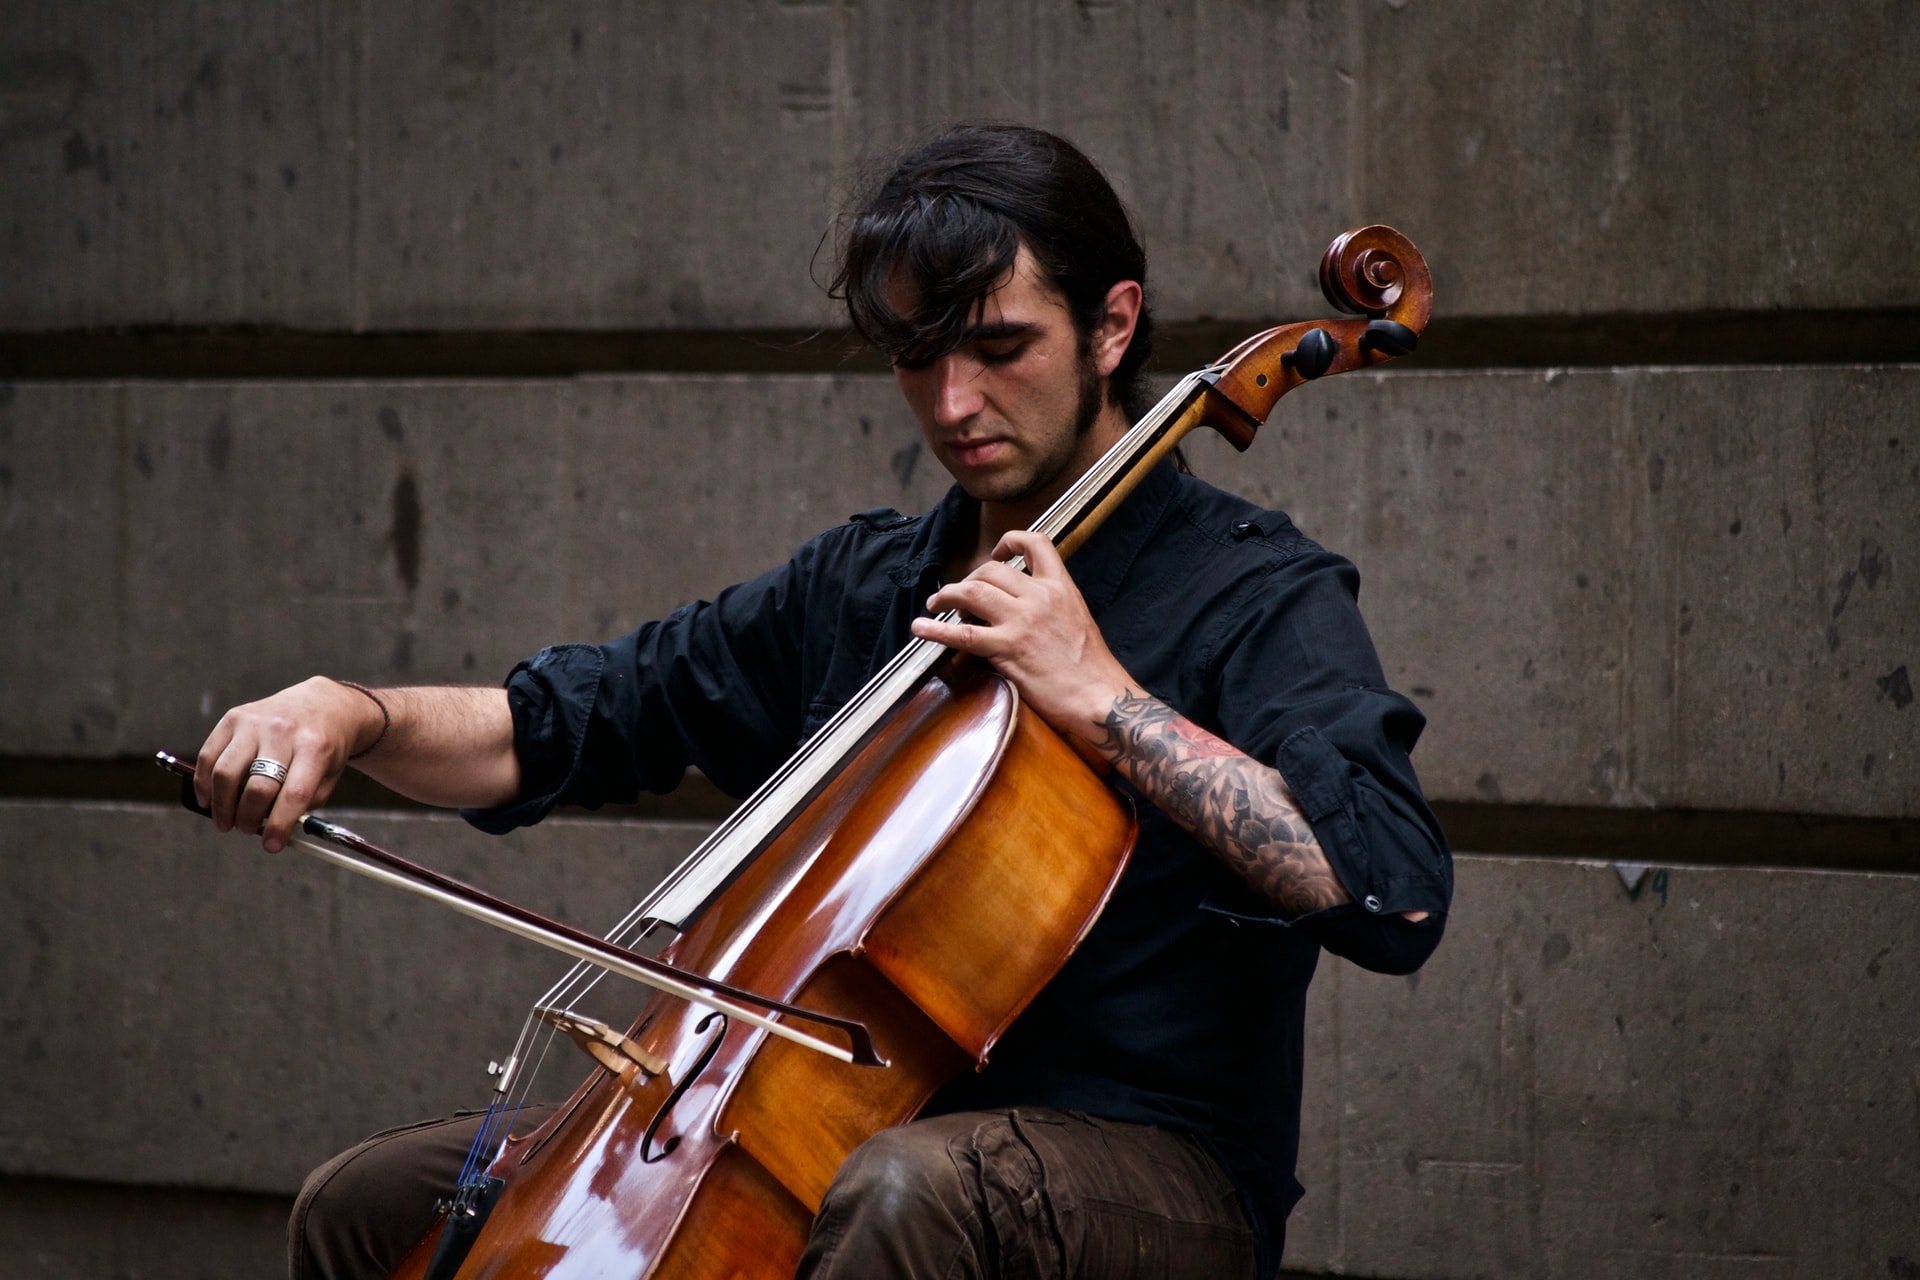
Learning how to hold a cello bow is a crucial skill for everyone, especially beginners. Beginners who fail to learn how to hold a cello bow the right way tend to develop bad habits that can interfere with their playing technique later when they apply finesse to their bow movements.
How to Hold a Cello Bow: Cello Bow Parts
Before you understand how to hold a cello bow correctly, you need to know the parts. I say this because it is easier for you to look at your bow and figure out where I am talking about if you know what the parts are called. Trust me; I tried it the first time without knowing the names of parts on my bow; it was not until six months later that I took lessons for the first time and realized I had been doing it incorrectly. That was a sincere pain to reverse.
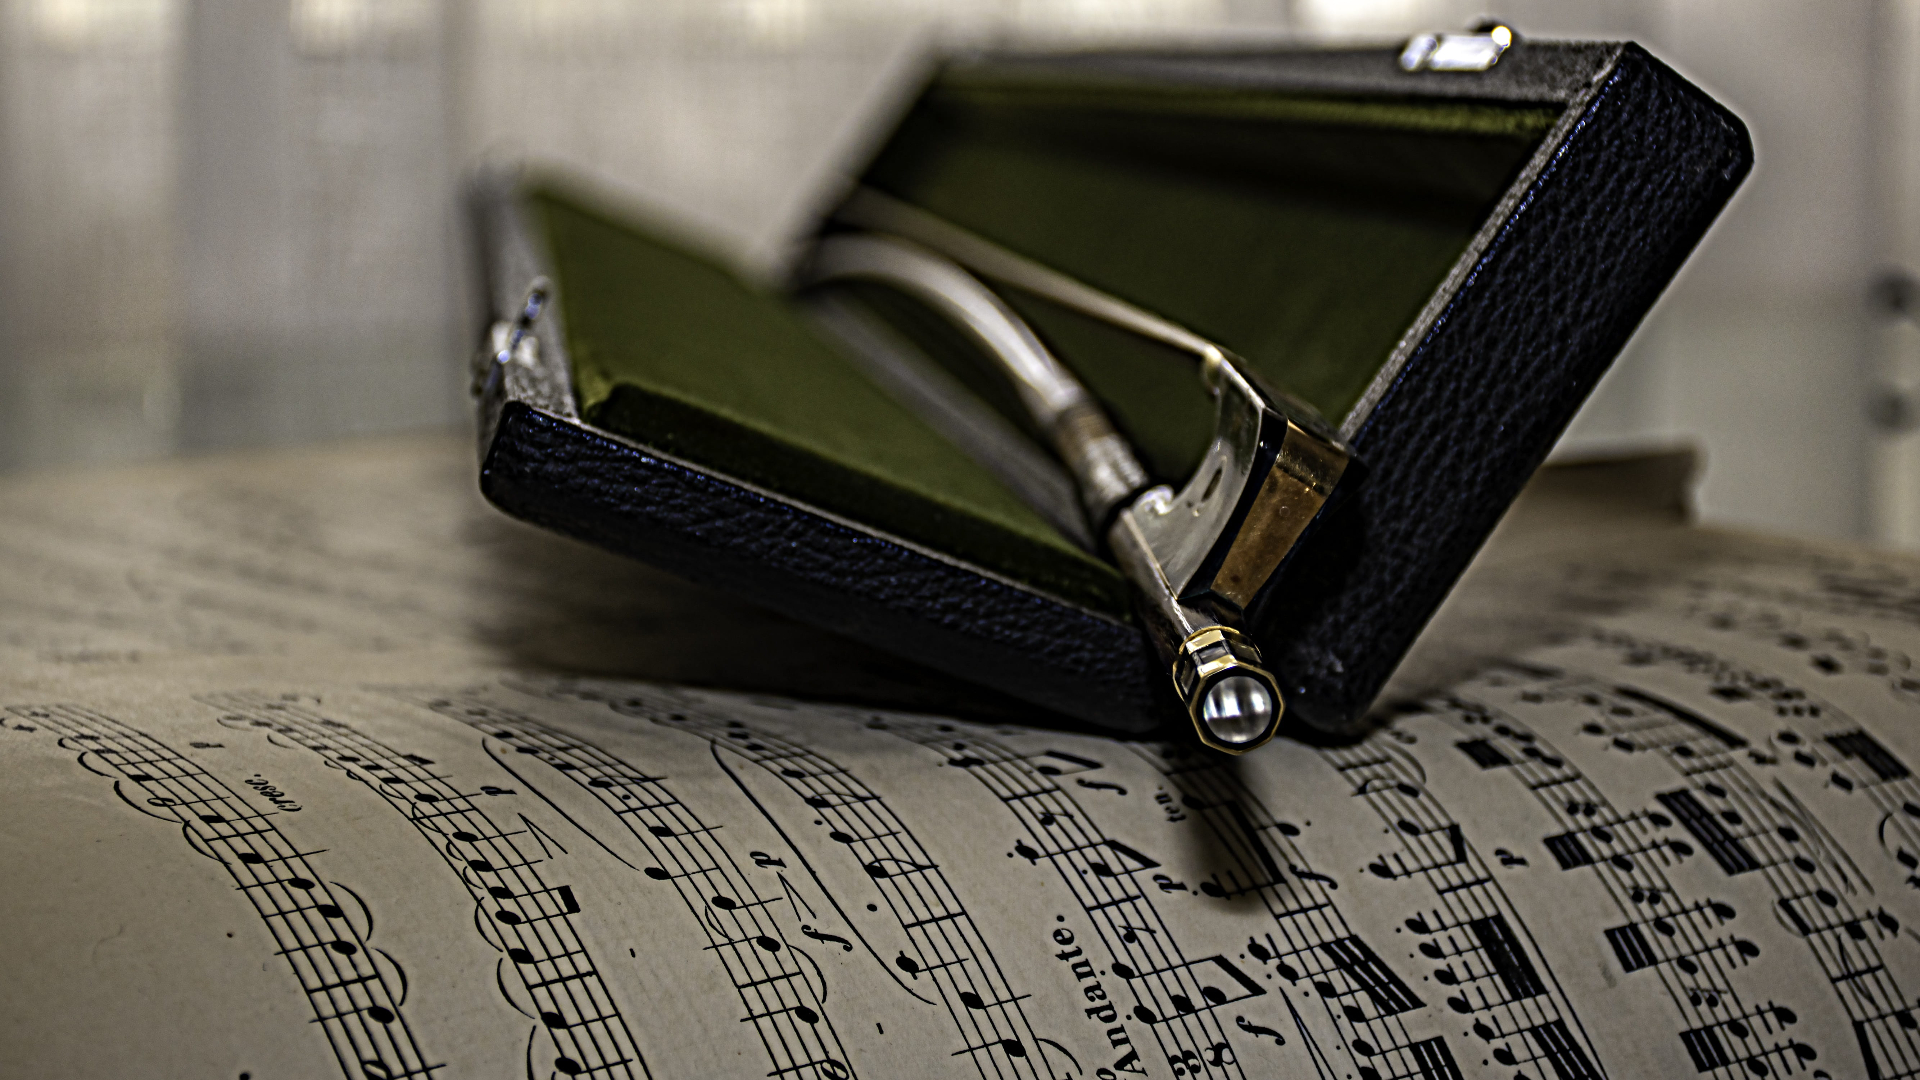
There are five key components:
#1 Stick
The stick is the backbone or spine of the cello bow. When you look at your bow, you will clearly see the stick that runs the entire length of the cello bow. The stick is made from wood (almost always), but the type of wood differs depending on the quality of the cello bow. Beginners should aim for a Brazilwood stick. Intermediates and professionals should consider Pernambuco or carbon fiber.
#2 Hair
Across from the stick is the hair. The hair strands run parallel to the stick, and they are responsible for creating vibrations when you press the hair against the cello strings. The hair is almost always horsehair. The horsehair comes from their tails. Mongolian horsehair is best. Unbleached is even better because it means no chemicals were used on the hair, which could compromise the sound quality.
Tip: You will need to invest in rosin to help your bow glide across the strings without getting stuck. You can research different rosin and how to rosin your bow.
#3 Tip
This is the top edge of your bow. This is where the hair connects to the stick. The tip is the highest point on the bow you can use when playing the cello.
#4 Frog
The frog is attached to the handle of your cello bow. Opposite the tip is the second place where the hair is attached to the bow stick. The frog is usually made of wood as well, like ebony.
#5 Grip
The grip is a small metal or rubber section at the base of the bow stick. As the name implies, this is where you grip the bow when playing.
Now, you should be able to look at your cello bow and see all five parts easily.
How to Hold a Cello Bow: How to Get Started
Step 1: Relax
When you learn how to hold a cello bow, especially as a beginner, you want the bow to feel like a natural extension of your arm. So if you are tense and worried about holding it incorrectly, you might carry that tension into your arm, wrist, and hand. Doing so will compromise the quality of your grip and your playing style.
Tip: A lot of people use what is called the “zombie drape.” This is where you pretend that you are a zombie and your muscles do not work. So, instead of holding tension in your arm, you have to just let it drape or fall in place while you prepare to grip your bow.
Step 2: Hand Up
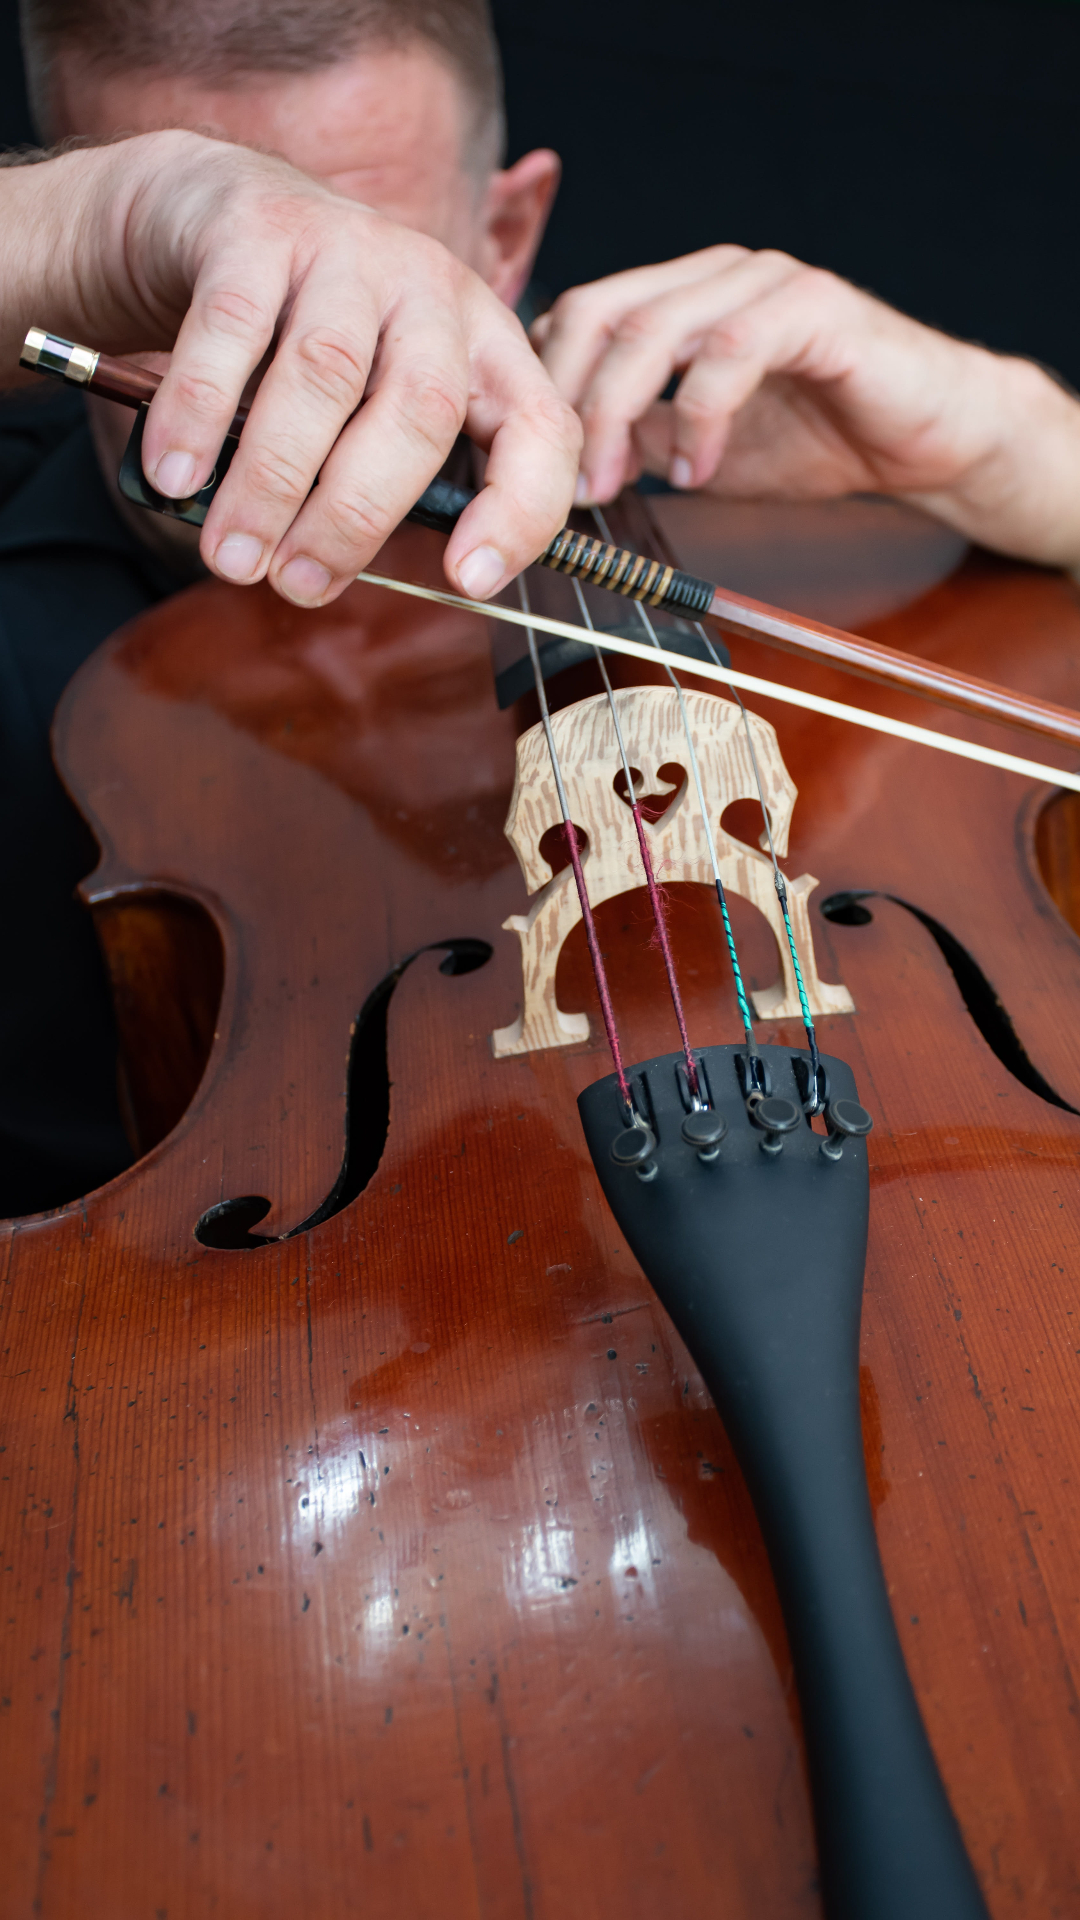
Take your right hand and place it up with your palm toward the sky. This hand will receive your bow. Using your left hand, put the frog on your cello bow to face to the right side. Place it along the second knuckle of your fingers. Let the stick of your cello bow rest in that space, at the second knuckle along all of your fingers. Your fingertips should hang out over the edge of your cello bow.
Step 3: Curl
Now, gently curl your fingers toward the bow and then subsequently toward the palm of your hand. Your thumb should touch the point where the frog comes into contact with the stick. Your fingers should rest comfortably with some space in between each finger. If your fingers are too close together, you will not have the stability you need to properly hold the boat or move it along the cello strings. Check that your first finger is not moving toward the tip of your cello bow and, instead, that all of your fingers are near each other.
Bend your thumb to create flexibility as you move the bow. You should have your thumb, as I said, right where your bow stick and frog meet. If you keep it straight, you will miss out on the flexibility you need for fine bow movements.
Tip: Grab a stick or a pencil using the same grip and see where your fingers naturally spread to give you good balance and stability. This is what you want to mimic.
Do: Relax your grip and give adequate spacing between your fingers so that they are not so close together that you can’t stabilize the bow with your movements.
do not: Try to stretch out your pinky and your first finger on the bow to have the widest foundation possible because this will take away any flexibility.
How to Hold a Cello Bow: What Your Fingers Should Look Like
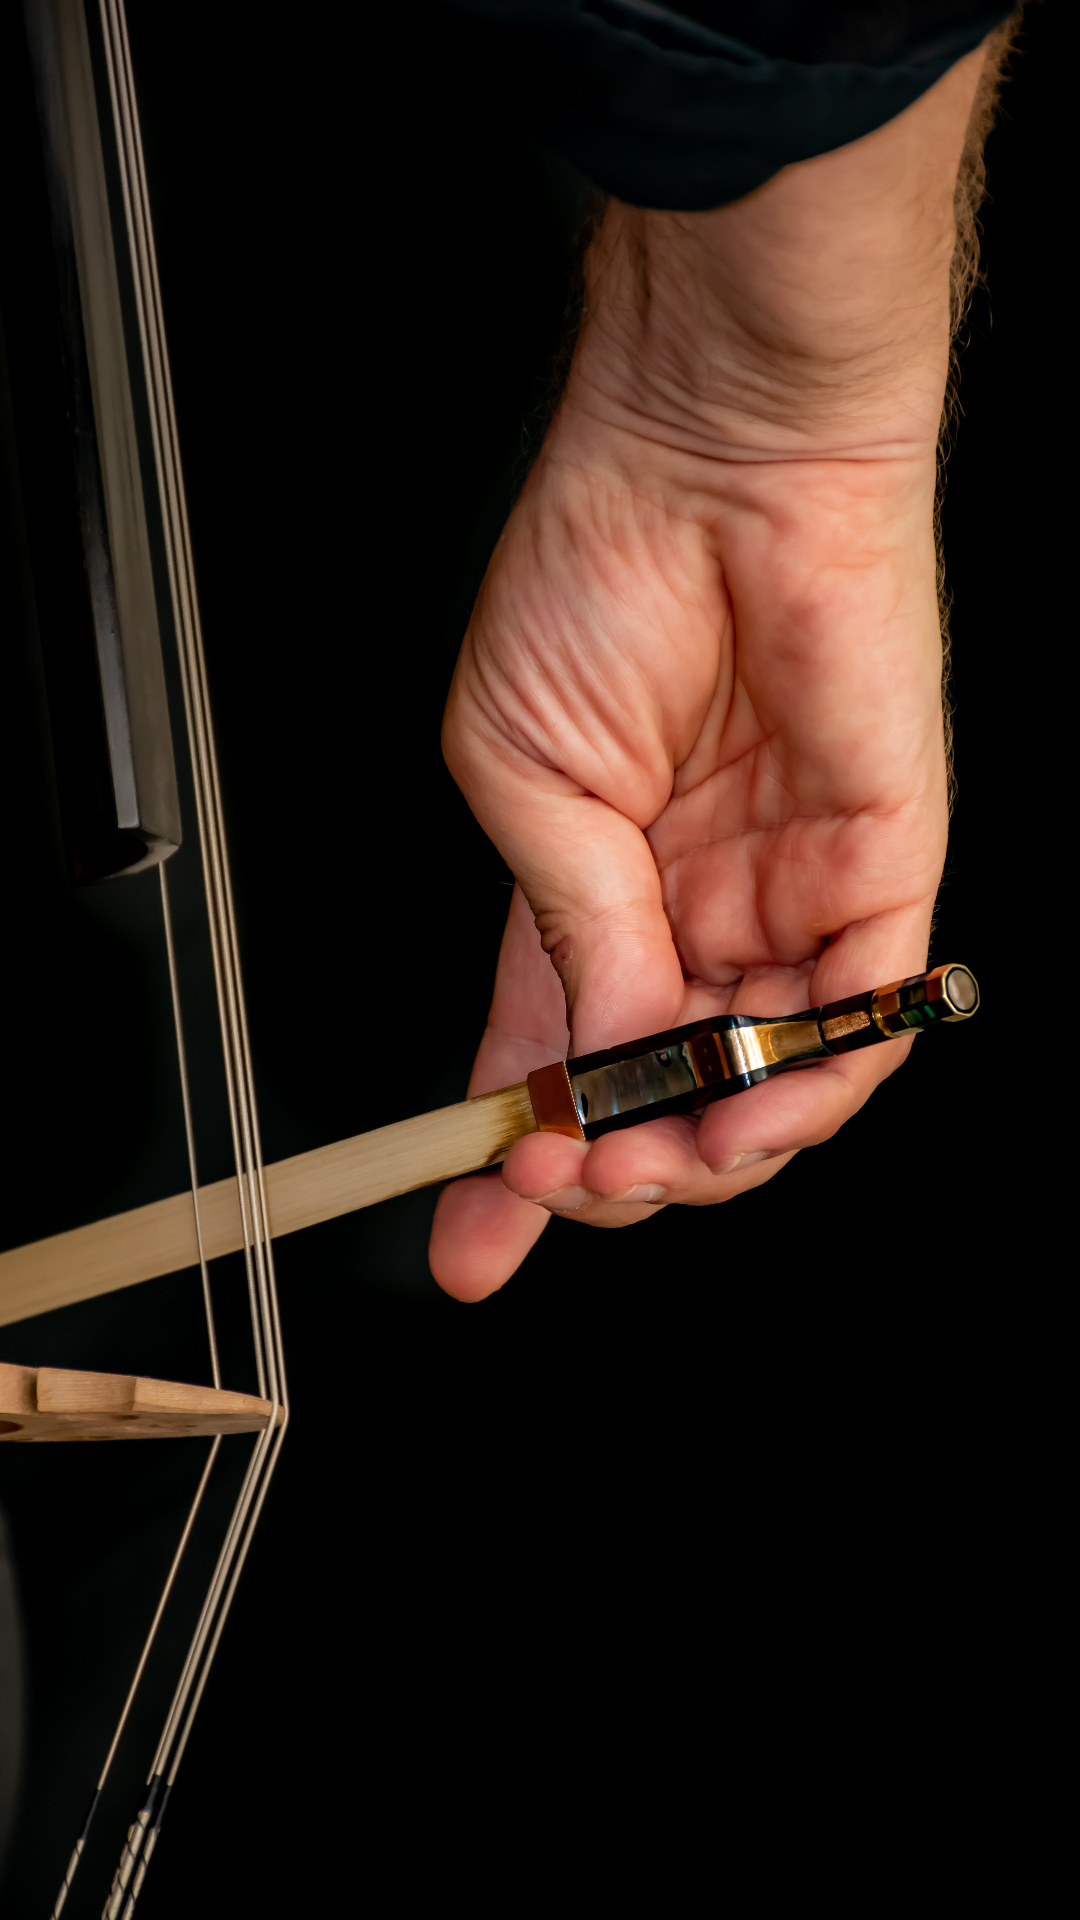
The three middle finger knuckles should slope down toward the end of the bow when you sit in front of your instrument. The pinky and thumb work hard to keep the bow on the strings.
Pinky: This should rest on the eye of the frog–that little dot right in the middle of the frog.
Third Finger: Next to the pink, this finger should rest on the metal strip that holds the frog and bow together.
Second Finger: This should rest on the ferrule of the bow.
First Finger: This should rest on the winding part of the cello bow.
Thumb: This should be bent, right at the point where the stick and frog meet.
As you look down, your arm should have a continuous slope downward so that your shoulder and arm, and bow all slope downward as one.
How to Hold a Cello Bow: Playing Your Instrument
Once you have the proper grip in place, it is time to practice. Many of my students get so excited when they finally have the right grip, confirmed by a teacher, and they want to rush right in. But this is where you can take your time.
Down Bow
Start your practice with the A string, or the highest string on your instrument. Place the bow on the A string and pull the bow to the right. This is a technique called “down bow.” You should practice this in a slow and steady fashion.
Up Bow
Run the bow all the way down the A string until you reach the tip. do not remove the bow from the strings; just run it back up the strings in the same manner. This is a technique called “up bow.” When you get to the frog, stop and repeatedly try a combination of down and up bow.
Now that you have practiced moving your bow up and down the strings a bit, look at how much of your bow hair is contacting the strings. There are two main techniques:
Flat Hair
Flat hair is when all of the bow hair is flush with your cello strings as you move the bow. Flat hair has more hairs touching the strings, so you get more vibrations. This means louder, more articulate sounds.
Slanted Hair
Slanted hair or tilted is when you tilt the bow such that some of the hair is turned out, slanted down toward the ground. The slanted technique means fewer hairs are gripping the strings and making vibrations, so you need to use other techniques to control bowing and dynamics. However, it also means a smoother, quieter sound.
Fun fact: There are specially manufactured bow frogs like the Galliane, which naturally tilt the hair so that you can use this technique full time.
You can play either. They are both just fine. You will naturally learn which you prefer.
When I play, I tend to tilt (though I do not have the Galliane frog). I tilt just a little bit. I do not like the flat hair technique because it takes away some of the tension, and this can detract from the dynamics.
How to Hold a Cello Bow: What Bows are Best
Now that you know how to hold a cello bow, it is important to know what cello bows are best. A poorly designed bow can still hold you back if you have great technique. That is why having a good technique and a good bow is best.
Fiddlerman Hybrid Cello Bow
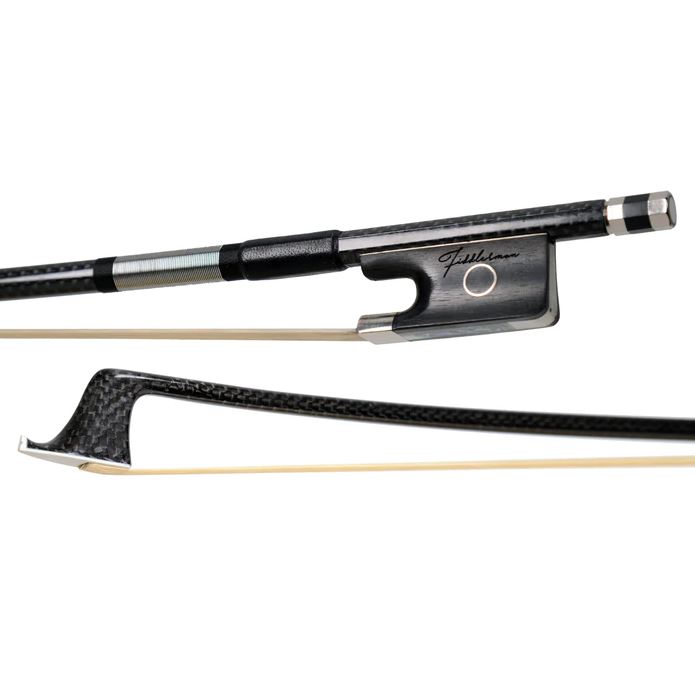
The Fiddlerman Hybrid Cello Bow is my favorite bow. It has the durability of a carbon fiber design but the appearance of a Pernambuco bow. It is called a hybrid because it is: it has a carbon-fiber core with a Pernambuco veneer. It is great for intermediates and professionals (or beginners who can afford it because of the balance, classy appearance, and lightweight design.
Pros
- It has a carbon-fiber core which makes it very strong
- It is made with Siberian horsehair
- It is very lightweight so you will not feel weighed down by a heavy bow
- It is well balanced, so it is easier to control
- It is affordable given its manufacturing
Cons
- It has a leather wrap that is the first part to come loose
Cadenza Carbon Fiber Bow
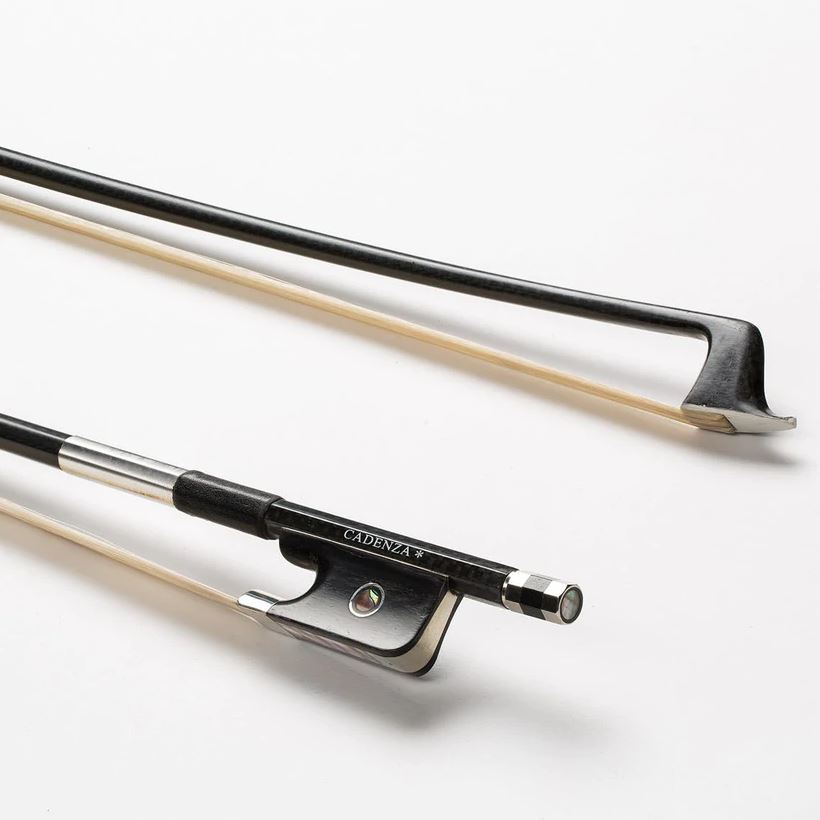
The Cadenza Carbon Fiber bow is another top consideration. This is a good pick if you are working with a Brazilwood bow or other beginner bow and want an upgrade. The carbon fiber is incredibly durable. The hair is high-quality horsehair. The bow offers excellent responsiveness and a good tone.
Pros
- It comes from a reputable manufacturer of cello strings
- Student-level carbon fiber bow that is affordable and well designed
- Excellent tone and response
Cons
- More expensive than student models
Yamaha Brazilwood Bow
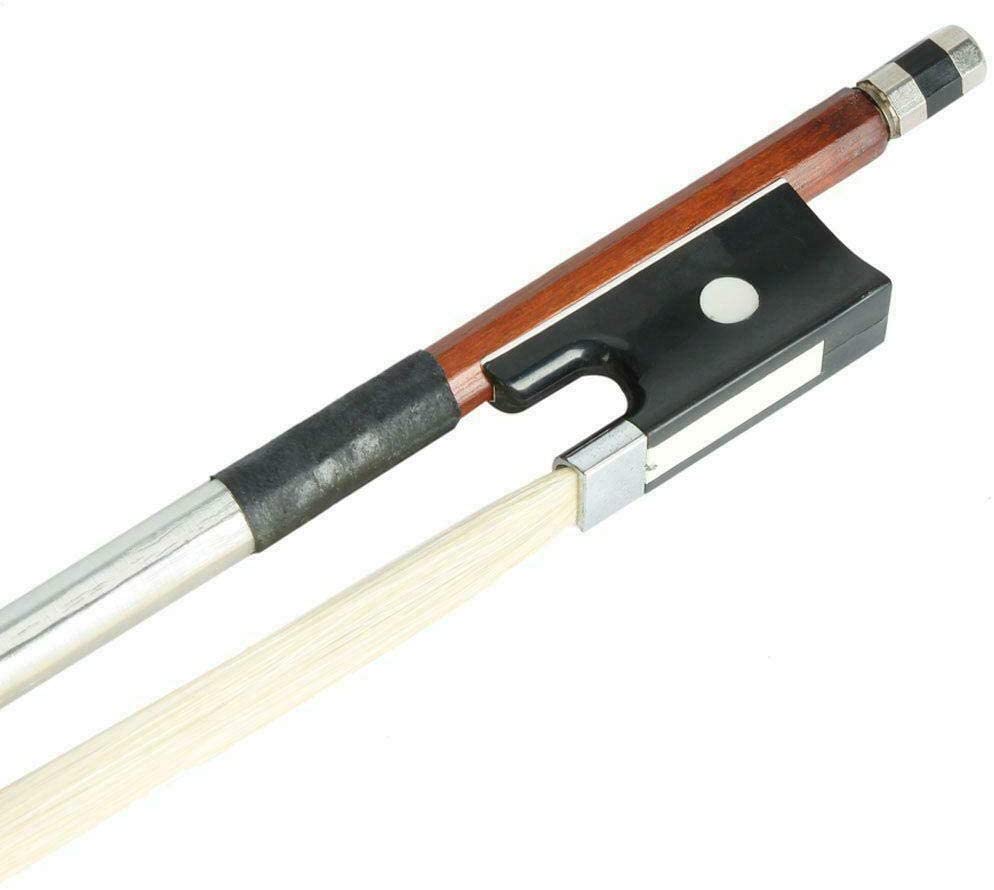
If you are a beginner, the Yamaha Brazilwood Bow is best. This is not quite the same quality as the hybrid bow above, but it does the job well. This is well-balanced, so it feels great in your grip. It is made with horsehair and Brazilwood. There is a leather grip with nickel-silver winding. It is meant for students and is inexpensive.
Pros
- It comes from a reputable brand
- Made with horsehair and Brazilwood
- Easy to repair
Cons
- A beginner model
FAQ
Answer: When you look at the space between the hair and the stick, it shouldn’t be more than a pencil. You can even hold a pencil to it to test. You do not want the cello bow to be too tight, or it can break your stick.
Answer: You can improve your bow hold by practicing every day. If you do the up bow and down bow techniques slowly, with control, you can improve every day you practice. You will gain better control and strength with time.
Answer: There is a screw at the end of your bow. Turn this counter-clockwise to tighten the cello bow tension and clockwise to loosen it. When the bow becomes straight and doesn’t bend at all, that is a sign your cello bow is too tight. You want it to have a bit of give, otherwise, you will not have any flexibility.
Bottomline
Learning how to hold a cello bow might seem intimidating at first, but it will become second nature once you practice a few times. Remember to keep your body, shoulders, and arms relaxed as you grip the bow, and practice basic bow techniques daily to improve your strength and control.
Looking for more interesting readings? Check out: